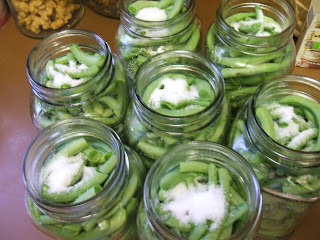
Aunt Karen picked her green bean bushes again and we had about 7 quarts.
We washed the beans and snapped them so they were ready to go. Packed them into jars and added a teaspoon of canning salt (this is different than regular salt, so be sure you get the right stuff) to each jar.
While we were packing the jars, we put the flats/lids in a small pot with water to warm. This allows the rubber to get nice and soft so it'll make a good seal against the glass rim of the jar. We also put a pot of water on to boil for pouring into the green bean jars.
Once the jars were packed, we put the recommended amount of water into the pressure canner and turned on the heat. Follow the instructions that came with your pressure canner for the proper amount of water.
Pour boiling water into each jar of green beans leaving a quarter inch of head space.
Remove flats/lids from the water they were warming in and top each jar. Place a ring on each jar and finger tighten.
Load your jars into the pressure canner and tighten the lid.
Once the lid is on and locked, keep heat on medium/high until you have a steady stream of steam coming out of the valve. Once achieved, cap the valve. Follow the manufacturer's instructions on how many pounds of pressure are needed. We cooked ours at 10lbs for 25 minutes.
Grab a glass of sweet tea and enjoy the company of your canning instructor, but keep an eye on the pressure gauge.
Once they're done cooking, turn off the heat and allow the pressure to come down. Once you're down to 2lbs of pressure, remove the valve and then remove the lid.
Using a jar lifter, carefully remove each jar and set on a heat resistant surface to cool.
Listen for the POP of your lids over the next few hours as your jars seal. It's a wonderful sound!


